

Can You Converting Comic In Clip Studio Paint To Webtoon
Introduction
How-do-you-do everyone!
I am Stephinni and this time I want to share with you the process of the painting style I'k using for my Webtoon: Pyxis. Finding the right style for it was a picayune scrap challenging, considering I wanted something dissimilar, something more "organic", but it needed to exist easy enough to work very fast. Luckily, Prune Studio Pigment EX has many tools that are helpful for the cartoon procedure.
In improver, I'thou going to talk a trivial about the general process. Let 's get to it!
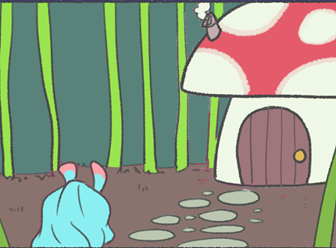
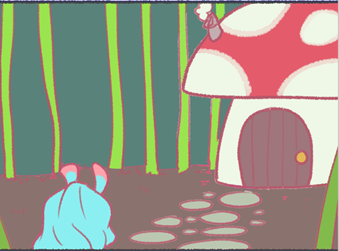
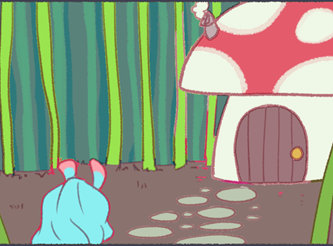
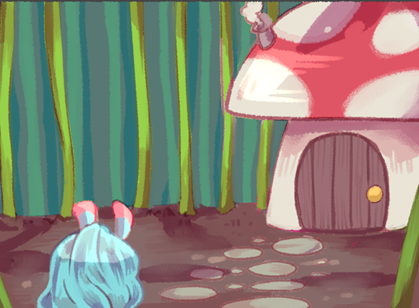
Click to expand epitome

Index
Before y'all kickoff cartoon:
- Story and Thumbnailing
- Canvas size and resolution
- Your tools for a "hand-crafted" manner
– Brushes, textures and their use
– Creating effects with these brushes
Story and Thumbnailing
Here I want to give y'all some tips on how to write the story:
- It's very important to investigate the topics you desire to include in the comic, for instance, I researched A LOT most astronomy and astrology for the story. It's not like yous have to exist an skillful, but information technology really helps you to build upwards the context and requite some logic to certain details during the narration.
- Do not be agape about the script. I know it is hard, however the Webtoon format is very friendly for visual storytelling, so the script doesn't need to be very long. Effort to go on the dialog summarized for the important things.
When writing it, I suggest you do it by panels. A panel is each scene you depict. Then, it is better if you lot do it like this to count how many panels you are going to draw for that affiliate. And endeavour to be as specific as possible so you can already imagine what is going to happen. Walter Ostie has a video where he explains the process.
I do information technology similar this:
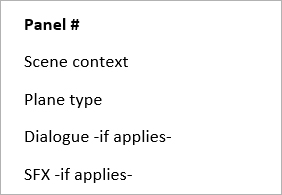
- For thumbnailing, I similar to keep the canvas vertical, similar y'all are reading the finished chapter. That mode information technology helps me to keep a good timing forth with the storytelling. The sketches are very simple, just for me to understand what'due south happening. Y'all tin can exist as detailed as you need to be with the line fine art afterwards. I similar to add the bodily text bubbles or narration hither to organize the reading in case I demand to add more than panels. I too add numbers to each panel to know how many I've drawn and to proceed the same order as in the script.

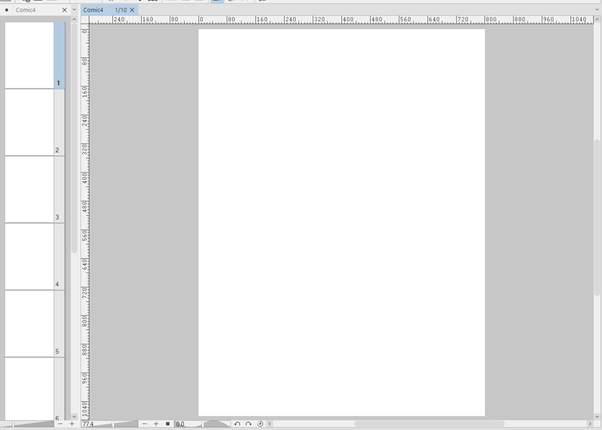
Canvas size and resolution
Prune Studio Paint EX comes with an awesome new format for webtoons! It is extremely piece of cake to use.
At that place are two ways to employ it:
1. Long sheet without divisions (my favorite)
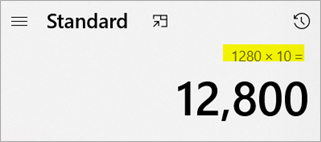
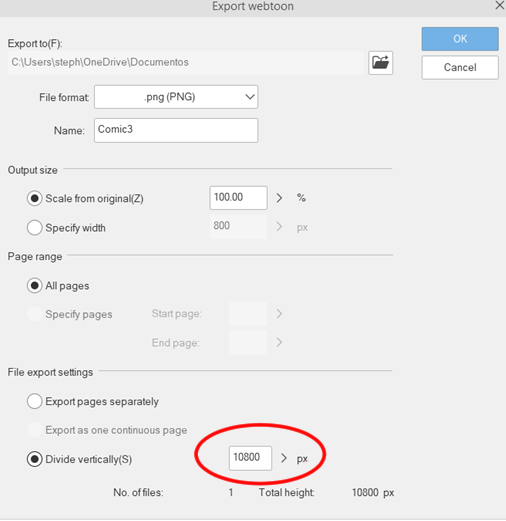
Set upwardly merely one page to proceed the webtoon format. I like to calculate the exact height of the long canvas. The average cell phone screen is 800×1280, and that's the size you must have in listen when dividing the Webtoon, then you tin can multiply 1280 past the number of parts you want to accept on the sheet. Then when yous split up it, you will have the exact size for each segmentation.
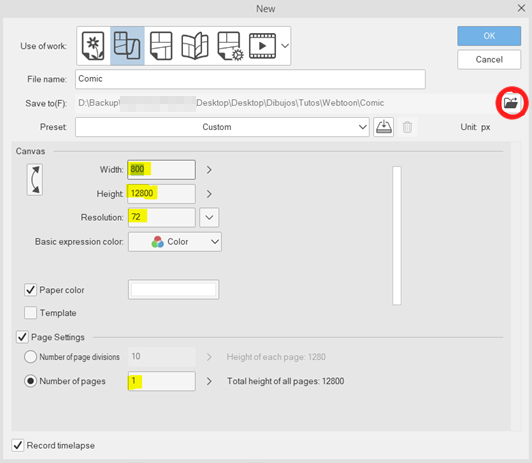
Case: I need the sail to be modest, but I desire to go on a good size to crop each part. Allow us say x divisions for height 800×12.800 px is the size.
In that example, the gear up upwards volition be similar this:
NOTE:
- Y'all must press "browse" (cerise circle) to create the folder where to be saved all the unlike divisions.
- I like to work in 72 DPI for webtoons.
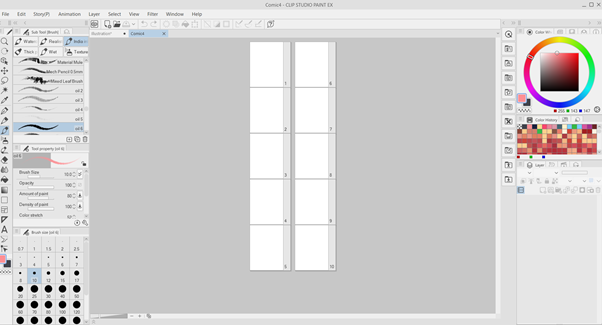
two. Divided canvas:
I do the same adding for the height and so the divisions lucifer with the 1080 height for each.

You lot will have this view.
Choose the one y'all want to piece of work on and this will happen.
Your tools for a "hand-crafted" style
The brushes I use are a agglomeration of oil brushes I downloaded many years ago and modified until I had the settings that are comfortable for me. I actually advise finding the correct brush for you and modifying it, however I'm going to show you lot the kind of brush and setup you must go on in mind to approach this particular style. The brushes I use are not made by me, so I propose to wait for similar brushes on Clip Studio Assets.
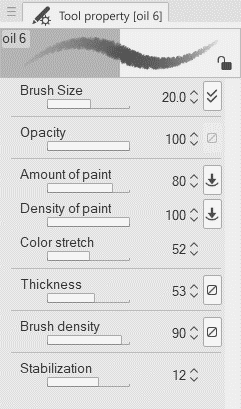
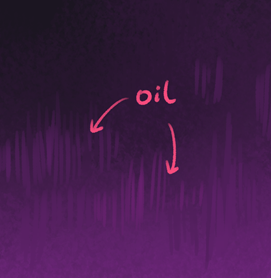
Oil brushes
The most important characteristics are these.
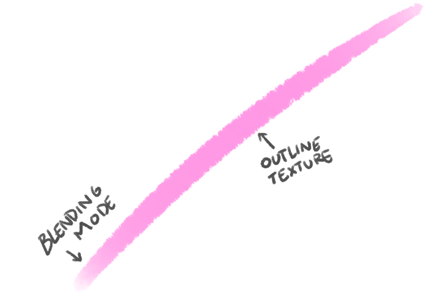
And then the fix upwardly can be adjusted as you feel is more comfortable for you lot. I like the brush to exist as solid equally possible, but still keeping a little of the blending fashion for the Amount of Paint percent. As you can encounter, the Stabilization here is loftier because I use the castor for lineart besides.
Brushes and textures and their use
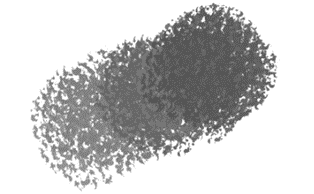
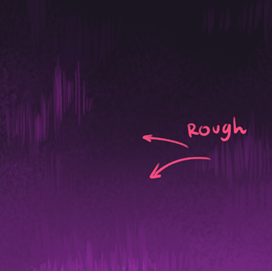
Rough Brush: This brush has its own blending mode, and information technology is already texturized. I only modified the density. Equally you can see, y'all can blend it by painting over multiple layers of colors.
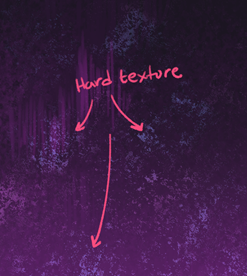
Difficult texture: This one is a castor that uses a specific texture
Creating effects with these brushes
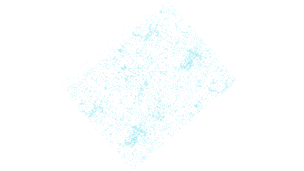
The all-time example I can show you is the way I practice basic starry backgrounds for the comic.
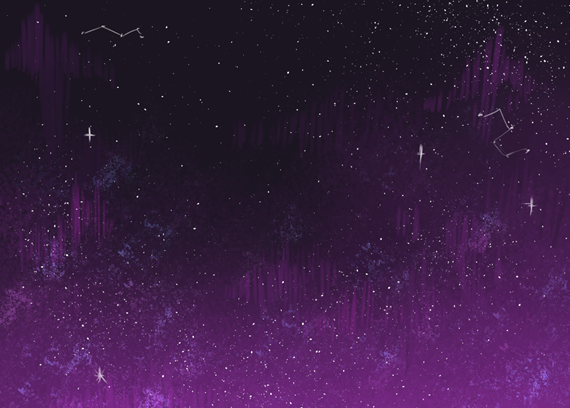
The oil brush can mix colors to create a unique blending style with many strokes like this.
The rough brush is helpful to requite texture to a surface similar this. The opacity of the brush will create unlike shades of textured paint.
Then the hard brush will give the final touch on to the whole scene.
At present let's start drawing and coloring the webtoon! I will also innovate techniques for unifying 3Dmodels and speech chimera tools for this hand-crafted style.
1. Coloring in the "manus-crafted" mode
This is very simple! Let'south go footstep by footstep:
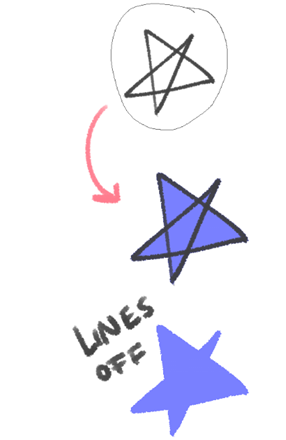
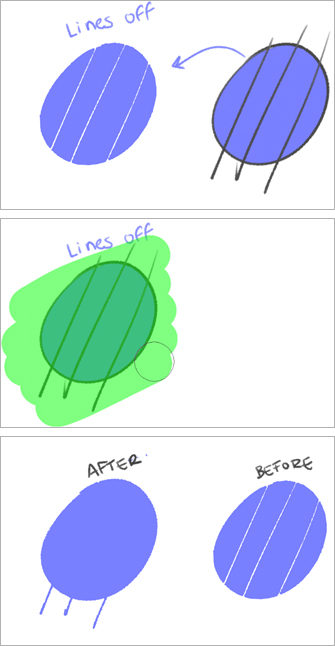
- Lines: Employ the oil brush to do the line piece of work. Make sure that the stabilization is on. Endeavor to consummate every line.
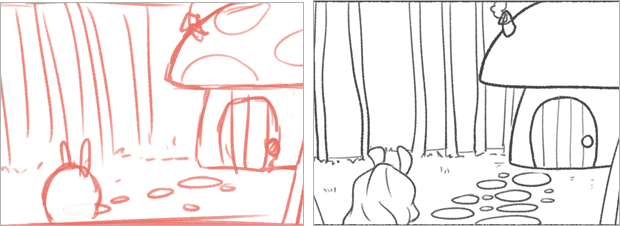
- Use the fill tool or the brush to fill the lines with the base of operations color. It tin be white or whatever other color yous want. I used many colors to know which layer contains the object since at that place are different objects in the scene.
- Employ the fill tool and refer to "other layers". That way you can fill sections of the line piece of work you already did.
- Colour the lines with whatsoever colour that match the palette you are using.
- Utilize "multiply" as a layer mode and and then "merge" layers.
- Create a new layer in "multiply" manner and use information technology for basic shadows. Then merge again and outset cleaning it.
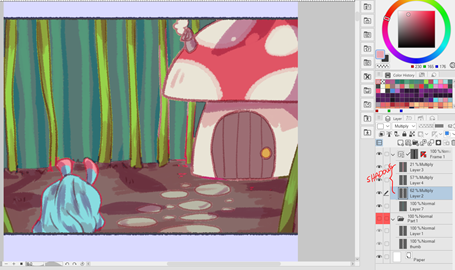
- If you wish, you tin utilize a textured castor to create some effects or a textured blender. That style y'all can give it an interesting look.

- Don't forget to add lighting where it is necessary.
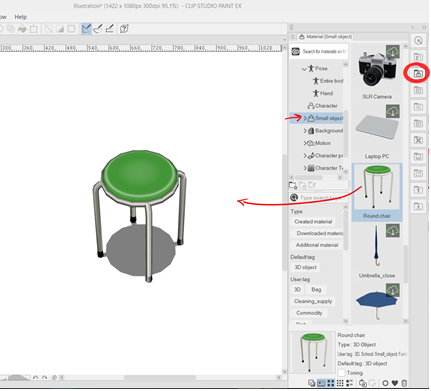
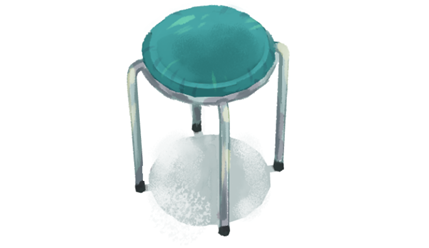
2. 3D Materials and how to use them to fit the manner
This is very tricky. Sometimes it is necessary to employ 3D materials to help you and stop the chapters with adept quality drawings and at a fast pace.
The style nosotros are using is not very suitable for 3D without editing it to match. Permit's see how we tin do this.
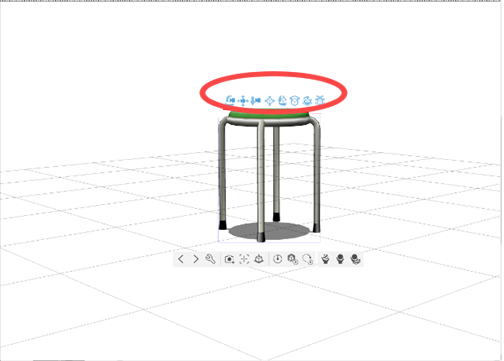
- Choose the 3D Material you lot demand.
- Play around until you detect the position and angle you need, using the controls.
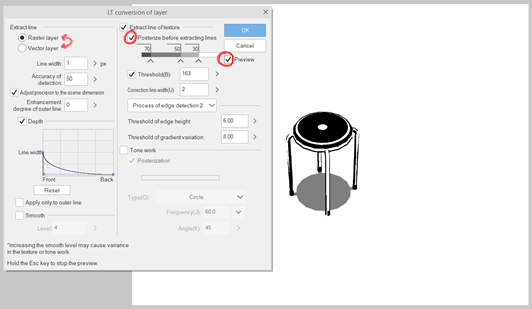
- Correct click on the 3D object layer and select LT conversion of layer.
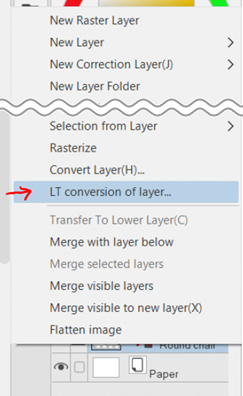
- Set the preview and change the settings until you have solid lines to paint over.
- Paint over it using the same technique we learned earlier.
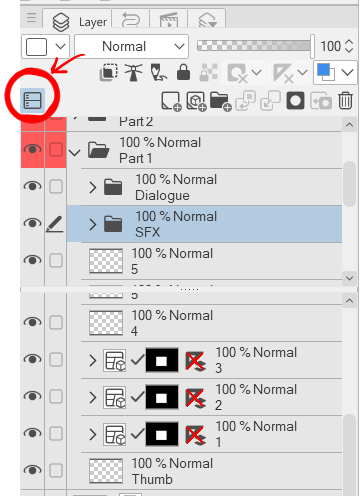
iii. Layer and folder fix upwards
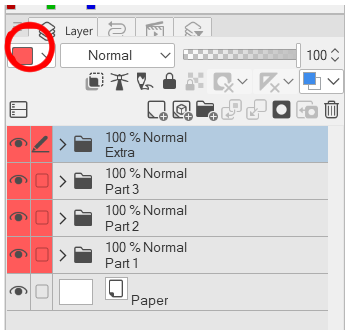
While you piece of work on your story, yous will detect that you must organize your layers and folders to make information technology easier. I suggest to have equally many folders as you need to complete a chapter in the size you cull.
This is an instance of how it looks when the chapter is done. I similar to add together colors to the main folders to identify them while working.
And this is how I usually organize each folder inside.
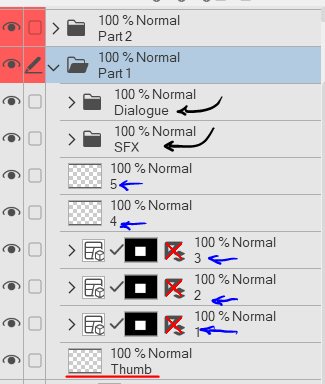
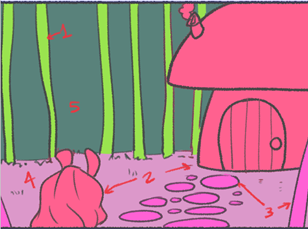
I use the Frame Border to create those "comic/manga" panels y'all see as 1, 2 and iii, but I delete the background layer inside and and then deactivate the rulers. This tool is the best one for your webcomics.
There are too normal layers for panels that don't need a frame.
I make additional folders for SFX and Balloons, so they don't get lost in other folders. Each folder can take more than 30 panels, so it'south necessary to organize. I try to name the layer the same manner I employ the number of the panel I'chiliad working on.
Keep in heed that you will demand to look into folders and layers, so splitting the layer palette to have ii parts will help.
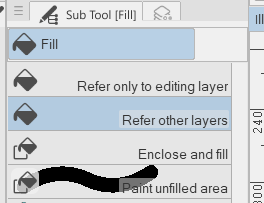
4. How to use the color fill tool for this fashion
We can use this bones fill tool to work in our Webtoon.
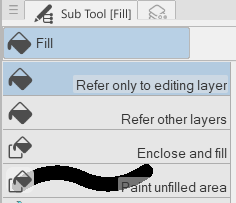
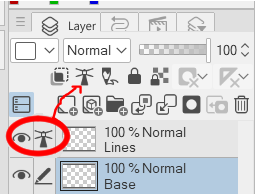
- For the base of operations color: Use the Enclose and fill tool.
Make sure this feature is activated: the "Reference Layer"
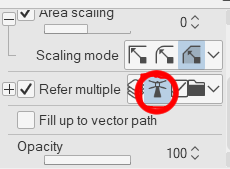
Make sure that the Reference Layer is the one you used for the line work.
Example:
- In instance there are blank spaces in the filled area: Use the "Paint Unfilled Area" it works likes a regular brush.

v. Applied tips for dialogue and text tool
This is one of the virtually of import things I do to save time.
- Add the text when doing the thumbnails/sketches. You volition be able to amend organize the amount of text and balloons you need per panel.
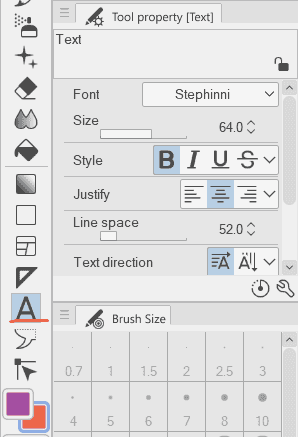
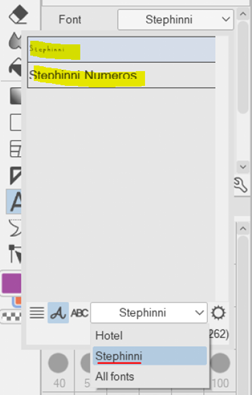
- Set the text tool. If you lot have more than i font as I practice. Y'all can create a section for information technology. I accept 2 different fonts considering I created mine, so at that place is one for text and other ane for numbers.
And then printing the settings icon. The carte du jour will prove upwardly and you are able to bank check how you desire it to be by default, spacing, style, transformation… All these preferences can exist changed and saved to use them equally the default settings.

- In the airship tool there are some interesting things to explore.
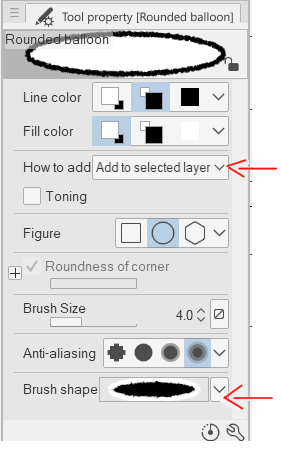
"How to add": You can choose between creating a new layer for that balloon or add it to the layer y'all are working on. I don't have a preference here, you should accommodate the preferences to your liking.
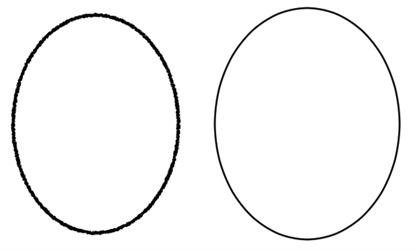
The "Brush Shape" is very nice, yous can add together a different look to the balloons. I like the "Spray", as it looks skilful for the style nosotros are going for here. Here is an example between the Spray Brush shape vs Pen Brush Shape.
If you click the "Performance Tool" y'all can adapt the airship already on the canvas. Information technology works like a vector.
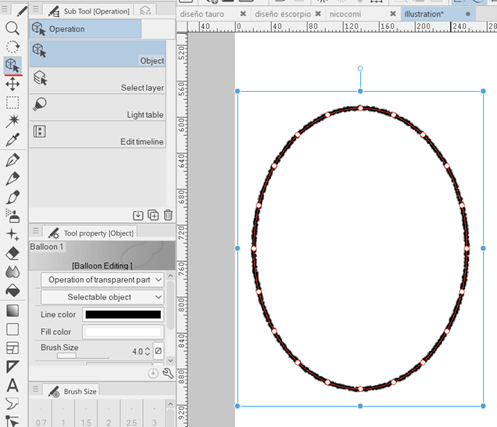
Select the right bending manner for the Airship Tail. I always prefer Spline.
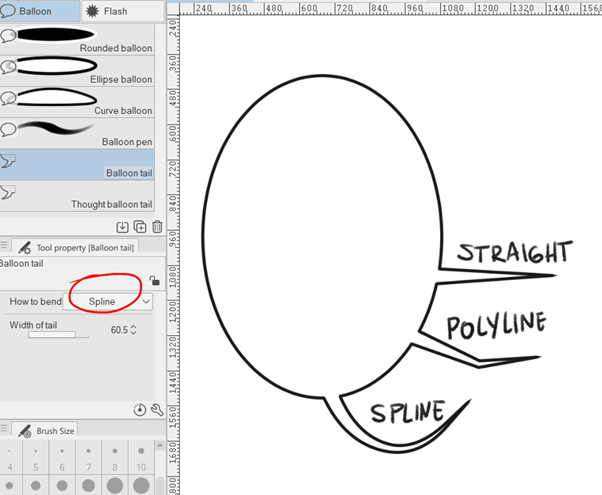
This is an example of the texturized line and a Spline tail.

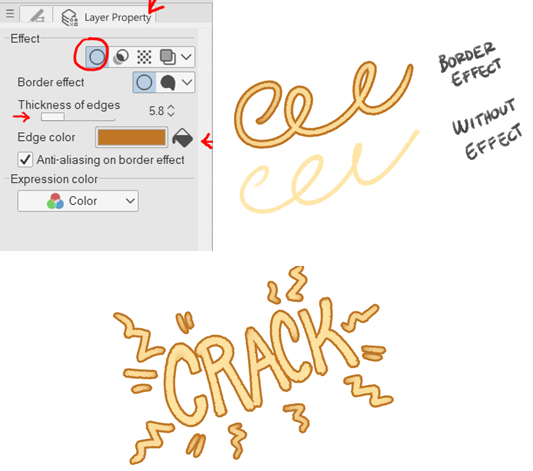
six. Special furnishings
Something very of import in a story are the SFX. This will create actress feeling for your audience to empathise while reading. This can be actions or onomatopoeia.
This is very like shooting fish in a barrel to practice, using the same oil brush we apply to paint.
Using the "Layer Property" window, you tin can select the "Edge Effect" where you can fix up the thickness and colour of the outline.
7. Additional materials
I strongly suggest to look for extra textures, brushes, tools and other materials on Prune Studio Assets, you volition notice thousands of resource that can aid you work faster depending on the plot and general style of your comic.
Call back that this fashion is generally using base colors so boosted materials and textures will bring a special aspect into it.
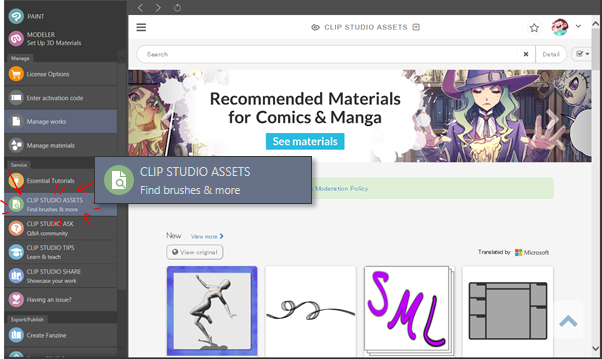
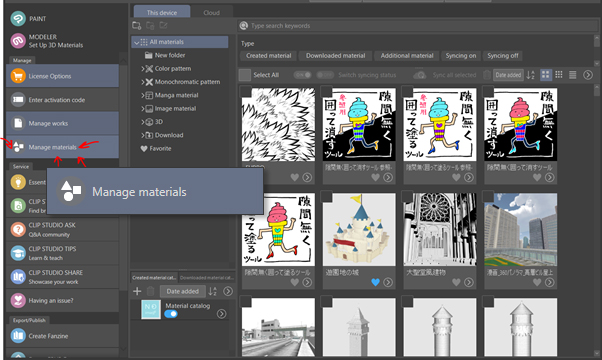
Where do you find the Assets? Easy:
- Open Clip Studio Pigment, then click this icon.

- This window will show up, and you can go to the Assets section.
Use specific words to look for the tools y'all need. It's very easy.
- The downloaded materials will evidence up here to install them in CSP.
8. Consign Webtoon
You must exist wondering why I kept a long canvas to work on it when I can exercise it already divided. I use a lot of space across the canvas to practice panels without frames, so I can non divide it from the beginning. Thankfully, there is an option called "Consign Webtoon" that is merely activated when you chose the webtoon format at the commencement.
There you tin split the long canvas. And every bit yous tin see I calculated x divisions at the beginning, now you can consign the file divided in the format y'all need. I will keep the same fix, but changing to the sectionalisation selection.
To consign is even easier Only go to the aforementioned option as in the starting time option and this will show up
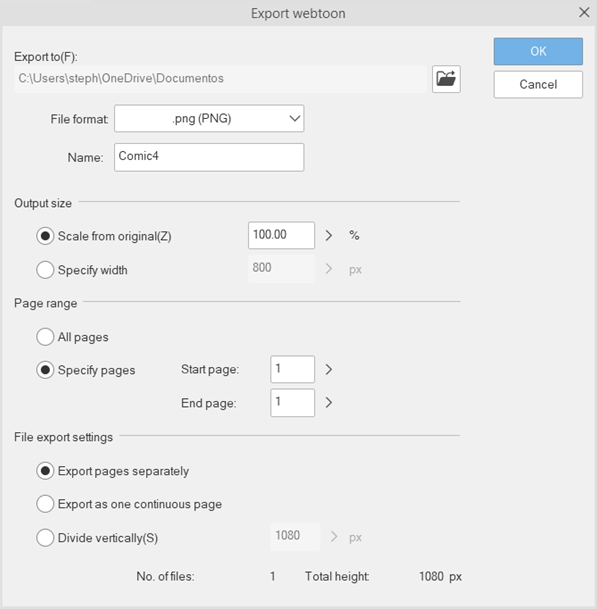
Export pages separately and set up other needs, and so you are ready to go!
Ending
That's information technology for this fourth dimension guys!
Thanks so much for passing past, and hope this gives you inspiration or motivation to work on your webcomic. Information technology is non as hard as nosotros recall, and all the hard piece of work is worth it when y'all come across the results.
If you take any questions, don't hesitate to contact me!
My social media:
- Facebook: facebook.com/stephinni
- Instagram: instagram.com/stephinni
- Twitter: twitter.com/stephinni
- Also my Patreon where I practise mini mentorships monthly: patreon.com/stephinni
- Discover my piece of work here: www.stephinni.com
Expert luck!
Stephinni
Source: https://www.clipstudio.net/how-to-draw/archives/165234
Posted by: warrencogy1971.blogspot.com
0 Response to "Can You Converting Comic In Clip Studio Paint To Webtoon"
Post a Comment